Tuesday, December 7, 2010

Kimchi Chigeh - Taste of Home and Love


WARNING:   
Due to the near-&-dear nature of the dish at hand, 
speaker waxes ad nauseum of theory, conjecture, and anecdotes. 
If not interested in such privations please skip to Ingredients and Direction section.


It’s one of those things.  Somewhere deep down in your soul, from the primordial matrix of things and thought that makes one Korean, wells up emotions that can only be described as home and love with only but a waft of the idea.  It’s that nostalgia-evoking, tear-jerking, mouth-watering, tongue-scorching concoction of Korean soul food goodness.

My experience with kimchi chigeh has been varied, to say the least.  There is the benchmark which was fearfully prepared from kimchi fermented in clay pots buried underground through a snowy winter, by a diminutive grayed grandmother from a mythical village in the mist covered mountains of North Korea.  And then, there is the tragedy I use to throw together in college, inspired only by my immature bravado, using raw kimchi, Tabasco sauce, hotdogs, and spoonfuls of imitation butter.  One was pungent and savory, spicy and sweet, robust and full-bodied, with flavors only a maestro could convict out from the orchestra of perfect ingredients.  The other could barely be considered sustenance (my deepest apologies to my college roommates who suffered through my learning curve).  Then, there are the countless forgettable, less-than-satisfying kimchi chigeh experiences at the local eateries here and there [excursis:  I’m not disparaging restaurants, but you just can’t make good chigeh in 15 minutes.  It’s my bad for expecting good chigeh in the same time you get bulgogi, ya know?] 

Over the years, after agonizing through dozens of trials and mistakes, and even a few recent successes, I’ve developed a working theory.  It goes like this:  “It tastes good because it’s not missing anything.  If it tastes bad, it’s missing something.”  Now, this does not mean to throw everything you got in it.  It does mean that there are components that I believe has to be there, that span the depth of the flavor spectrum.  I believe there are 4: 

  1. Bright Herbaciousness on the Surface
    1. green onions
    2. goh-chu-gha-ru (Korean chili powder)
  1. Sweet & Sour Sub-Surface Thrust
    1. sour from the well fermented kimchi
    2. sweetness of well fermented kimchi,
    3. sweat onions
  1. Earthy/Meaty Foundation
    1. cabbage & radish components of kimchi
    2. beef &/or pork
  1. Deep Under-Current of Oceany Brininess (Umami, if you will)
    1. squid, anchovy, or oyster components of kimchi
    2. dried anchovies (or fish sauce)
    3. M.F.G – mysterious fermentational goodness
So, with all that said, here’s what I’ve put together that incorporates the factors of my kimchi-chigeh theory.


Ingredients:
  • 2lbs Kimchi, well fermented
  • 1 cup Kimchi Brine
  • 2 cups Beef Broth (can substitute with ½ lbs of stew beef if you want a more meaty chigeh)
  • Water (to cover ingredients in Stage 1)
  • ¾ lb Pork Belly slab, skin attached
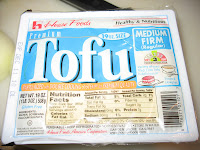
  • 1 lb Tofu (medium to firm, 2” cubes)
  • 3-5 large Dried Anchovies (substitute w/1tbsn of fish sauce)
  • 1 large SWEET Onion
    • 1-2 tbsn sugar (if not using sweet onions)
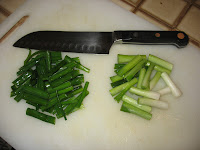
  • 3-4 stalks Green Onions
  • Goh-Chu-Gah-Ru (Korean red chili powder) to taste in regards to spice.
 
Directions:

Stage 1
  • Obtain well fermented kimchi; should smell ferocious, but still edible (see Helpful Hint); if whole or quartered kimchi, cut into bite size portions.
  • Break down Sweet Onions into bite-size cuts
  • Dice and drain tofu into large cubes, according to your preference.

  • Dice green onions into 1-2” strips, 

  • Slice pork belly through layers into ½” thick squares 

  • Remove head and guts from dried Anchovies.

Stage 2
  • Into a large stockpot add all ingredients, except for Tofu, Pork Belly, and half of the Green onions, including all the white parts of the green onions.
  • Bring to a boil and reduce to simmer for about 1.5 (yes, that long; open some windows)
  • Taste for salt, and also for sweetness; add salt and sugar to taste; start with small amounts (do not add sugar in the beginning; sugar will over-soften kimchi and make it mushy.)  You may also need to add water, depending on saltiness
  • Add Pork Belly and Tofu and bring to boil and reduce to simmer for 30 more min (don’t overcook pork belly; it will fall apart and that’s no fun).

Stage 3
  • Add remaining green onions and goh-chu-gah-ru to taste, and let simmer for 5 min.
  • Remove from heat and let cool slightly before serving.
  • Serve in separate bowls or just go nuts and double-dip old-school Korean family style.

 Helpful Tips: 
  • If purchasing kimchi, allow the bottle to ferment outside (not necessarily outdoors; your neighbors will hate you, even if they’re Korean) of the fridge for two days.  Make sure to have a catch for the overflowing juices; yes, it will leak even through the lid.  Your house will smell like death too. 
  • Plan ahead.  Every time you have some kimchi, collect the left-overs, including the brine, in a sealed jar or tupperware, and stow it way back in the fridge.  If you're like me, you should have enough product by the end of the month. 
  • Drain Tofu well.  If you don't, you will get lots of excess liquid that will muttle and mute the bright flavors.  Dice up the tofu early in Stage 1 and allow liquids to leach out.  


 Short Cuts:
There are no good short cuts.  Please take my word on this.  In my frequent desperations to satisfy my kimchi chigeh fix, I’ve done all kinds of things – add vinegar to raw kimchi, add butter, lots of sugar, sesame seed oil, blast with High heat, add Spam, (no, wait, Spam does work J ), etc… nothing (else) worked to achieve the matured flavors that can only come from good ingredients and low-slow cooking.


Final Words:
I do understand that, even to this day, debates rage as to what makes for the best kimchi chigeh.  And I would only humbly add that my recipe is but one of many that may be considered enjoyable.  Again, my tenants compose a theory, and not fact.  It is definitely a work in progress.  I do hope that one day, that one of my concoctions will at least touch the fringes of the hem of the masters.  Speaking of masters, I would be remised if I do not offer my deepest love, respect and thanks to the grayed grandmother from the mythical village in the mist covered mountains of North Korea, for cooking tirelessly in the church kitchen to provide me with that magical bowl that will forever haunt my heart and dreams, and of course, to my mom who raised me on her wonderful beloved kimchi chigeh that can never be separated with my thoughts of home and her love.

I hope you enjoy it.  Let us know.

Tuesday, November 16, 2010

Soba in San Diego


 Don't hate, but I live in sunny San Diego.  And the weather has been... well, something like this...


Pretty awesome, not gonna lie.  I do apologize to the Tribe that live in places forsaken by sun and surf, because for us, it is Soba Season all year long, at least for our family.  In all honesty, we were out of white rice and I was tired of brown rice.  So, I perused the pantry for inspiration, and VIOLA!  Soba noodles!  The kids love it and we haven't had it in a while.  Great!  Now for the sauce... I found it, but, alas, only a tiny bit left, definitely not enough for 5.  I read the ingredients and it wasn't complicated at all, just soy sauce, vinegar, bonito flakes (katsuo-bushi), and sweetners & preservatives.  I tasted it, and thought to myself, "I can do this!" and did it.  It wasn't exactly like the commercial sauce of course, but it turned out nice.  Here's how... 

[Excusis: I don't do a lot of measuring.  I'm usually just eye-balling it.  The amounts list below are estimates.  So please taste and adjust often as you go.]

Ingredients:
  • Dry Soba Noodles - usually come in serving size bundles, one bundle is generally enough for one of my kids.  You can get them at any Asian store, and most mega-mart have them too.
  • 3 cups water
  • 4"x4" sheet of Kombu (Dried Kelp used for making dashi)
  • Katsuo-bushi - smoked and dried bonito flakes (I don't know how to describe the amount; with three fingers I grabbed a healthy bundle of the stuff.  You will need to go to an Asian store to get this one)
  • 1/4 cup soy sauce
  • 1/4 cup mirin
  • 1 1/2 tbspn lemon juice 
  • 1/2 tspn sesame seed oil
  • Salt & Pepper


Directions:
  • Boil water for soba noodles in large stock pot
  • Bring 3 cups of water to a boil in a small stock pot.
  • Reduce to simmer and add all ingredients to the 3 cups of boiling water (except for the soba noodles of course)
  • Allow to simmer for 30-40 mins.
  • Taste and adjust with soy sauce, salt & pepper
  • Filter through a fine strainer and let cool in the frig.
  • When water for the noodles come to a boil, add soba and allow to boil for about 5 min.  You will do lots of rinsing, so remove soba when it's al dente.  
  • Prepare an ice bath
  • Rinse noodles in cold running water (for the purist, buckwheat flower and WATER are the focus of soba.  Use the best water you can source), and transfer to ice bath; allow soba to get COLD but don't leave it in there too long.
  • Remove soba from ice bath and strain in a colander, shaking gently to remove excess water.
  • Ideally, you wanna serve soba on a dish that will prevent them from sitting in excess water. Serve the sauce in a separate bowl; you could serve with julienned cucumbers & nori, finely diced green onions, grated daikon radish, wasabi (my favorite), and a coupla dashes of roasted sesame seeds.
I also made some bulgogi for ban-chan, but that's another post.

Hope you enjoy it, even if you're not in San Diego ;)  Let me know.

Sunday, November 7, 2010

Kare-Kare from Ate Lucy

It's pronounced "ah-tteh" and means "older sister" in Tagalong.  You see, not long ago, I was adopted into the Filipino community here in our neck of San Diego.  And I've discovered that nobody enjoys food and life more than my Filipino com padre's.  Ate Lucy is a good friend who does some serious Filipino cooking.  There is NOTHING that she has made that I do not want as an execution meal. 

Kare-Kare is Filipino Beef Stew, but it's no ordinary stew.  It's special.  It's soul, comfort, celebration, and love all in one simple pot of simple ingredients.  Drooling yet?  Yeah...  To my utter dismay and chagrin, I've never had Lucy's kare-kare, so I've asked her for the recipe.  This is what she sent…

Ingredients:
·    1 kilo [2.2lbs] of beef (round or sirloin cut) cut into cubes, beef tripe or oxtail (cut 2 inch long) or a combination of all three (beef, tripe and oxtail)
·    3 cups of peanut butter
·    1/4 cup grounded toasted rice
·    1/2 cup cooked bagoong alamang (anchovies)  [fermented anchovie paste, available at most asian markets]
·    2 pieces onions, diced
·    2 heads of garlic, minced
·    4 tablespoons atsuete oil [or annatto oil; gives distinct yellow color of kare-kare; available at Filipino markets]
·    4 pieces eggplant, sliced 1 inch thick
·    1 bundle Pechay (Bok choy) cut into 2 pieces
·    1 bundle of sitaw (string beans) cut to 2" long
·    1 banana bud, cut similar to eggplant slices, blanch in boiling water
·    1/2 cup oil
·    8 cups of water
·    Salt to taste

Instructions:
·    In a stock pot, boil beef, tripe and oxtails in water for an hour or until cooked. Strain and keep the stock.
·    In a big pan or wok, heat oil and atsuete oil.
·    Sauté garlic, onions until golden brown, then add the stock, toasted rice, beef, oxtail and peanut butter. Bring to a boil and simmer for 15 minutes. Salt to taste.
·    Add the eggplant, string beans, pechay and banana bud. Cook the vegetables for a few minutes - Do not overcook the vegetables.
·    Serve with bagoong on the side and hot plain rice.


Picture from http://recipe.foohta.com/kare-kare/


Thanks Ate Lucy for sharing and welcome to the Tribe!  I can't tell you how excited I am to try it!  I hope to do Kare-Kare justice.  I'll let you know. 

(If you’d like to share your recipes too, email them to koreandadscancook@gmail.com)

Wednesday, November 3, 2010

Pantry Pork Chops in a Pinch

Sometimes it’s not ideal - the tool, the time, the timing, the ingredients or the lack their of.  Sometimes Korean Dads just have to improvise and make do with what they've got.  Here's what happened... 

It's 5ish and my beautiful wife texts me saying she's bringing home pork chops; they were on sale and it’s what's for dinner.  She also wants mashed potatoes and veggies, zucchini & yellow squash to be specific.  I ask how she wants the chops.  She says, "Flavorful."  [Excursis:  You gotta understand my wife; she's a sauce girl.  She loves sauce.  Doesn't matter much the kind.  She just wants more flavor.  She will pour gravy over her bbq sauce to make it more "flavorful."]  So, I'm thinking that I need at least 4 hours to marinade the chops in something bold, and that I need to grill it.  But, it's now after 5pm and dinner needs to be at 6:30 latest for the kids.  Pickin' up what I'm puttin' down? 

I go into desperation mode.  I run out to the back yard to visit Old Rusty, my trusty back yard propane grill (propane vs charcoal will be thoroughly examined in a future post).  I fire her up and DISASTER!  The Home Depot aftermarket performance burners have been rusted and burnt through and there is one giant column of flame in the middle/back of the grill.  Time for Plan B.  What's Plan B?  Gonna have to broil the chops.  Not a bad idea.  But what about "Flavorful?" 

Ok, I decide to make something Asian and create an Asian gravy for the extra Flavor!  I look for garlic, no garlic.  I look for ginger, no ginger.  I look for onions.  We have ONIONS!  Woohoo!  I open the pantry and quickly scan...  I see lemon pepper, soy sauce, garlic powder, sugar, sesame oil, and a strange bottle that reads in big letters... "GINGER flavor dressing, Great for Salads!"  I try it and it’s not bad.  Very gingery and tart.  I'm gonna use it.  Here's what I did...

Ingredients: 
8-.5lb pork chops (not much marbling at all and lots of bone dust; but the flesh was firm and well hydrated; meat quality and the art of choosing meat will be discussed in a future post). 
.25 cups soy sauce
.25 cups Ginger Flavor Dressing (see pic)
.25 cups EVOO (Extra Virgin Olive Oil)
1 tbsp sesame seed oil
2 tbsp table sugar
2 tsp garlic powder
1 tsp lemon pepper
.25 large red onion (finely diced)
.25 stick butter
1tbsp all purpose flour


Marinade (more like a Dip due to the time issue)
Add all ingredients (minus the butter and flour) in a large mixing boil and wisk together, paying special attention to macerate the diced onions (could have used a blender or food processor but remember the time issue? Yeah…)


Pork Chops
Set oven on high broil.  Set one oven rack to broil and the other in the middle to finish in bake mode.  Dip pork chops into the marinade/dip, assuring full coverage.  Place chops on roasting pan and broil for 5 minutes or until surface is slightly charred.  Turn over and do the same on the other side.  Remove from broil rack and place in middle rack.  Set to bake at 400 F for about 7min or until internal temp reaches 145ish (internal temp will rise a few degrees to about 150 F for medium well; if you need it to be well done, then add another 3 min or wait until internal temp is 170.  Any more than that becomes shoe leather, unless you like shoe leather).  Remove chops and allow to rest for 5-10 mins before serving.

Gravy
Create a rue with a butter and flour under medium heat.  When rue turns light brown, add remaining dip/marinade and allow to simmer.  Add dripping from the pork chops into gravy mix and stir frequently to thicken.  Cut with water if needed and add a few grinds of pepper (I’m pretty sure you will not need to add salt). 
Add gravy modestly to pork chops and mashed potatoes. Serve Pan Grilled Zucchini and Yellow Squash (I will post recipes and techniques for mashed potatoes and Grilled veggies in a future post for “basics.”)

Result

(How in the world do I get my food pics to look as gorgeous as Freeing My Martha?)

It turned out ok.  Actually, the wife and kids rather enjoyed it.  Look, like most avid cooks, I’m not proud that I used garlic powder and premixed Ginger Flavor Dressing.  But in a pinch, it works.  And, sometimes, when everything is wrong, it turns out just fine.

Hope you enjoy the recipe, and my pain.  Let me know.

Monday, November 1, 2010

Post - Halloween Butter Garlic Roasted Pumpkin Seeds

I know, it's a little late.  But, the good thing is pumpkins are on sale!  So get out there and buy a big ole pumpkin and start scooping seeds.  The results are pretty good, if I say so myself, at least for my first time...

Ingredients: 2 cups pumpkin seeds, 1/4 stick of butter, 1 tbsp kosher salt, 1 tspn garlic powder.

Directions:  Preheat Oven to 350 F.  Separate seeds from membrane - rub the whole mess vigorously until seeds release from slimy stuff.  Add seeds to a small stock pot and add salt and water just to cover the seeds.  Bring water/seeds to a boil and drop the heat to a low boil for 10min.  Drain well and discard salt water.  Place drained seeds back into the pot.  Over low heat, dry the seeds for 5 min. (you will get some scum building up the bottom of the pot but don't worry).  Add butter and garlic powder and mix thru, stirring for about 5 min, or until ingredients are well incorporated.  Transfer seed mix to baking pan and spread the seeds out.  Roast in oven for 10-15min depending on your oven.  Mix about half way thru.  Keep an eye on it.  It should end up kinda golden in color, and the skin should be "crackable."  Cool seeds for about 5 minutes before eating, and let it cool completely before storing (or else the residual moisture will make it soggy).


Clean-Up:  Add about a cup of water to the stock pot and boil off the scum, scraping with an appropriate utensil.

Enjoy!  And, let me know. 

Introduction

Hi!  I'm Tim, a Korean Dad.  And, Yes!  Korean dads can and do cook!  Like most Korean parents, the measure of my love for my family can be quantified by how much I feed them, or at least by how many times I ask, "Are you hungry?  Did you eat?"  And I do love my family. 

So, here's my typical 1.5 generational fob-sob story:  We immigrated to the States in 1975.  My parents were never home, and my older sister (8yrs) and I (6yrs) had to fend for ourselves.  Eventually, my sister discovered her disdain for the culinary arts, and would pay me $2 per meal I cooked for her.  Not so bad for a kid back in the 70's, especially, because I found myself enjoying it, in fact, looking forward to it!  So, here I am in my 40's still cooking for my family, and still loving it!

Much of my cooking is of the Korean persuasion, but I have ventured in other cultures and styles, and I am really enjoying the discoveries.  So, allow me to share my love and my journey with y'all.  I will share recipes of course, but I will also share my epiphanies, as well as adventures in coming up with successful dishes that my typically finicky kids will eat, and some that were just utter failures.  I am also very involved in sportfishing, and will share some of my fishing and culinary adventures.

Thanks for visiting the site.  I'm glad you found me here.  Hope you enjoy your visit.  Let me know.